Back to the list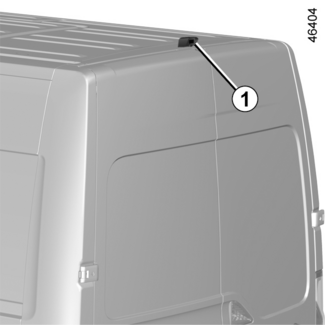
Rear camera
Rear camera
WARNING
This function is an additional aid. It cannot, therefore, under any circumstances
replace the vigilance or the responsibility of the driver.
The driver should always be ready for sudden incidents while driving: always ensure
that there are no small, narrow moving obstacles (such as a child, animal, pushchair,
bicycle, stone, post, etc.) in the blind spot when manoeuvring.
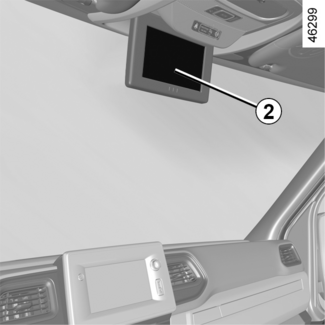
When the ignition is switched on, the 2 screen on the roof centre console displays the view behind the vehicle that is transmitted
by the camera 1.
Note: the screen 2 view may be displayed left to right.
Special features
The camera is equipped with an automatic de-icer which is activated when the temperature
is below approximately 8°C.
Make sure that the camera 1 is not obscured (by dirt, mud, snow, condensation, etc.).
Operation
Tip
Objects which appear on the edge of screen 2 may be deformed.
In very bright light (snow, vehicle in sunshine, etc.), the camera view may be partially
obscured.
In low brightness or poor weather, the image on the screen may be distorted.
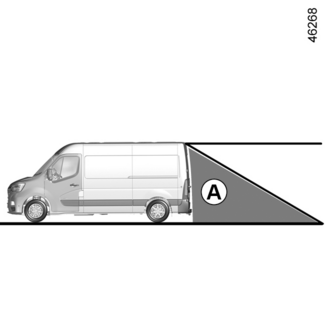
The camera's field of vision does not cover the entire area behind the vehicle, particularly
the blind spot area A.
For vehicles equipped with the
Stop and Start
, the display remains active when the engine is on standby STOP AND START FUNCTION.
Switching off the function
The display switches off:
- up to approximately ten seconds after the reverse gear is engaged;
- 30 seconds after the ignition is switched off.
Adjustment of the display
Accessing the brightness modes
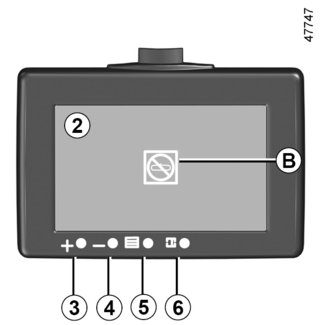
Press button 6 repeatedly to select one of the four preset brightness modes:
- "day" mode;
- "intermediary" mode;
- "night" mode;
- "black screen" mode: allows the display to be suspended. The screen 2 displays a black image accompanied by the "OFF" message. To exit this mode, press the button 6 again to access the first brightness mode ("day" mode).
Adjustment of brightness modes
Tip
Each time the vehicle is started, the function returns to the settings saved at the
last engine stop.
Once the mode has been selected, press the button 5 as many times as required to access the type of setting you wish to change:
- brightness;
- contrast;
- colour;
- Reset: resets factory settings.
Press button 3 (+) or 4 (-) to change the setting.
Note: only the first three modes ("day", "intermediary" and "night") can be set.
Operating faults
When the system detects an operating fault, warning light B appears temporarily on the screen 2.
This may be caused a temporary fault affecting the camera or screen (clearness, fixed
image, delayed communication, etc.).
If the warning light remains on, consult an approved dealer.