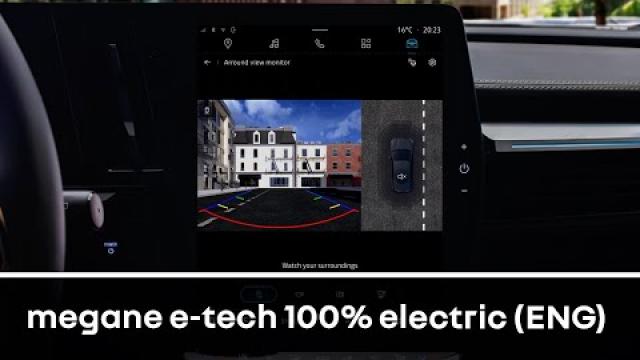
360° CAMERA
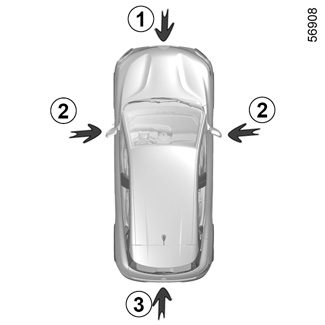
Using information from cameras 1, 2, and 3 located in the front bumper, door mirrors and on the tailgate, as well as ultrasonic detectors 4 located in the vehicle bumpers, the feature assists with difficult manoeuvres (e.g. parking) by displaying the vehicle surroundings.
Note: make sure that the cameras are not obscured (by dirt, mud, snow etc.).


Operation
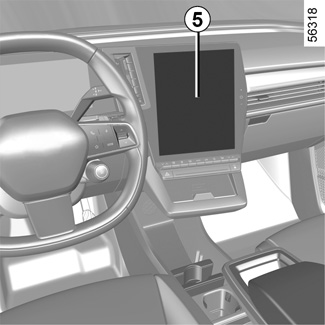
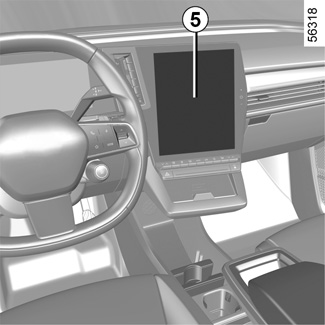
The cameras transmit several separate views to the multimedia screen 5.
They enable you to view the vehicle surroundings:
- front view (using the camera 1): standard front view and panoramic front view;
- rear view (using the camera 3): standard rear view and panoramic front view;
- bird’s eye view (using the 1, 2, and 3 cameras): standard bird’s eye view and pop-up bird’s eye view (when an obstacle is detected);
- side view (using the camera 2): front side view and rear side view;
- 3D view;
- trailer view.
The ultrasonic detectors detect obstacles at the front, rear and (depending on the vehicle) side of the vehicle.
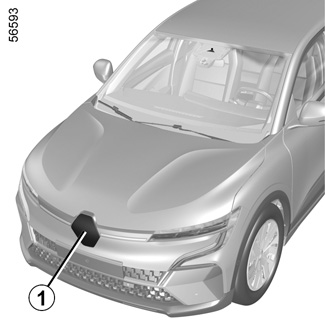

Front camera 1
The view of the front camera is displayed on the multimedia screen 5.
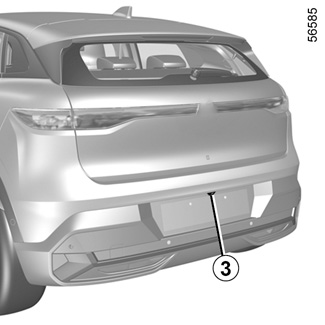
Rear camera 3
The view of the rear camera is displayed on the multimedia screen 5.
For the rear views, the multimedia screen 5 shows a reverse image of the rear view as in a rear view mirror.
This function is an additional aid. It cannot, therefore, under any circumstances replace the vigilance or the responsibility of the driver.
The driver should always be ready for sudden incidents while driving: always ensure that there are no small, narrow moving obstacles (such as a child, animal, pushchair, bicycle, stone, post, etc.) in the blind spot when manoeuvring.
In front view or rear view: when manoeuvring on a slope, objects shown on the multimedia screen may be closer or further away than they seem.
Take this into account in order to correctly assess the distance before any manoeuvre.
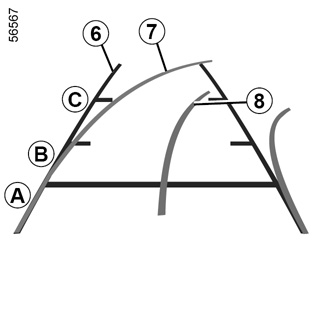
The “front” or “rear” view transmitted to the multimedia screen 5 is displayed with one, two or three guide lines 6, 7 and 8.
This system is initially used with the aid of several gauges (mobile and trailer for trajectory and fixed for distance).
Fixed clearance gauge 6
The fixed clearance gauge comprises coloured markers A, B and C indicating the distance behind the vehicle:
- A(red) approximately 30 centimetres from the vehicle;
- B(yellow) approximately 70 centimetres from the vehicle;
- C(green) approximately 150 centimetres from the vehicle.
Moving guide line 7
This is shown in blue on the multimedia screen 5. It indicates the vehicle trajectory according to the position of the steering wheel in the front and the rear view.
Trailer guide line 8
This is shown in blue on the multimedia screen 5. This indicates the trajectory of the trailer towbar according to the steering wheel position.
It allows the driver to position the towbar as close as possible to the trailer’s towing head.
The front, rear and side view guidelines are a representation projected onto flat ground; this information must not be taken into account when superimposed on a vertical object or an object on the ground.
Objects displayed on the edge of the multimedia screen may appear distorted.
In very bright light (snow, vehicle in sunshine etc.), the camera vision may be adversely affected.
In the combined representation from the cameras:
- raised objects (pavement, vehicle, etc.) may appear distorted in bird’s eye view;
- any objects on top of the vehicle are not displayed.
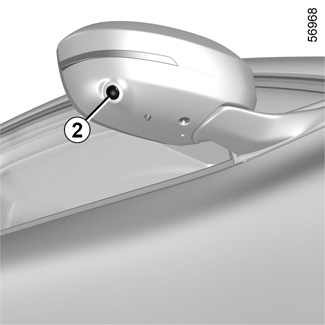
Driver’s side front side camera 2
The 2camera, fitted in the door mirror, transmits a side view to the multimedia screen 5.
Depending on the vehicle, you can use the multimedia screen to change the bird’s eye view to the front side view. Please refer to the multimedia instructions for further information.

Bird’s eye view
The bird’s eye view is a combined representation from cameras 1, 2 and 3.
It displays a view of the top of the vehicle and its surroundings.
This can be used to confirm a view of the vehicle position in relation to its immediate surroundings (front, rear and side).
In “bird’s eye view” mode, the objects displayed on the multimedia screen are actually further away than they seem.
Take this into account in order to correctly assess the distance before any manoeuvre.
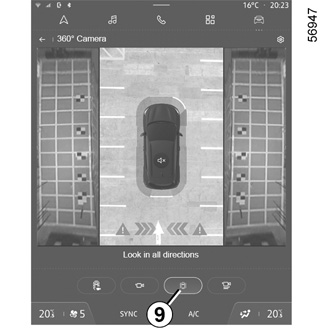
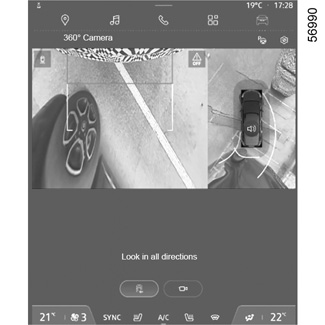
Side views
On the multimedia screen, by pressing the dedicated button 9, you get a view combining a bird’s eye view and two side views.
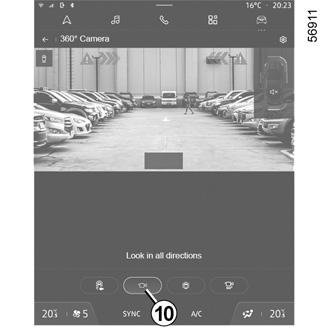
Front panoramic view or rear panoramic view
On the multimedia screen, by pressing the dedicated button 10, you get a panoramic front view.
When reverse gear is engaged, the front panoramic view is replaced by a rear panoramic view.
Note: the front view or the rear view varies depending on the steering wheel angle to improve the driver’s vision.
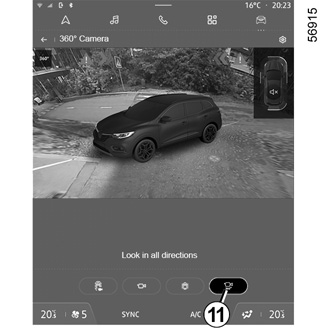
View 3D
On the multimedia screen, by pressing the dedicated button 11, you get a 3D view allowing you to view the vehicle and its surroundings in three dimensions.
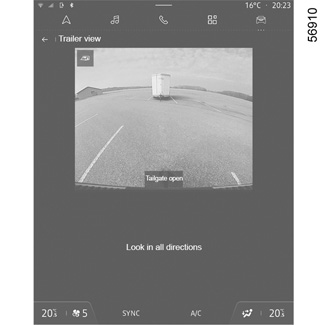
“Trailer view”
In forward gear, if a trailer is attached, press the “360° Camera” menu in the “Vehicle” World of your multimedia screen 5 so that the camera 3 transmits a view of the rear environment for approximately 30 seconds.
From the multimedia screen, when the “360° Camera” system is displayed, you can change the views (e.g. Replace the rear view with the panoramic rear view).
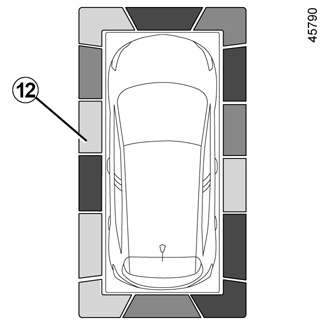
Obstacle detection
While the system is activated, if the “Park Assist” function detects one or more obstacles around the vehicle, the 12 indicator line is displayed on the various views.
In addition to the sound alert, these indicator lines show the proximity of obstacles via different colours:
- green: obstacle between approximately 50 and 70 cm;
- yellow: obstacle between approximately 30 and 50 cm;
- red: obstacle within approximately 30 cm.
These indicator lines also show the location where the obstacles are detected, as indicated by their positions in relation to the “Vehicle” symbol.
For more information PARKING DISTANCE CONTROL.
“Zoom auto" function
If an obstacle is detected in the vicinity of the front or rear of the vehicle, the “Zoom auto” function switches the current display to a specific display (top, front or rear view).
To activate or deactivate the “Zoom auto" function, please refer to the multimedia instructions.
Activation/deactivation
Automatic mode
With the vehicle stationary and the engine running, automatic mode is activated when the reverse gear is engaged. The rear view and the bird’s eye view appear on the 5 multimedia screen.
When the reverse gear is quickly shifted to forward gear, the rear view and bird’s eye view are replaced by the front view and bird’s eye view on the 5 multimedia screen.
Automatic mode is disabled:
- after approximately three seconds, when shifting from reverse gear to N or P position;
- after approximately three minutes, if the vehicle moves forwards or backwards (e.g. carrying out a manoeuvre) before shifting the lever to N or P position;
- when the vehicle speed moving forward exceeds 6 mph (10 km/h).
Manual mode
To activate manual mode, with the vehicle stationary and the engine running, from the “Vehicle” World on your 5 multimedia screen, press the “360° Camera” menu, the front view and bird’s eye view appear on the multimedia screen.
Manual mode is disabled:
- when the vehicle speed moving forward reaches 6 mph (10 km/h);
- when the gear lever has not been used for approximately three minutes.
- Do not use this function while the door mirrors are in folded position.
- Ensure that the luggage compartment door is properly closed before using the function.
- Do not place any objects on or in front of the cameras.
Difference between the estimated distance and actual distance
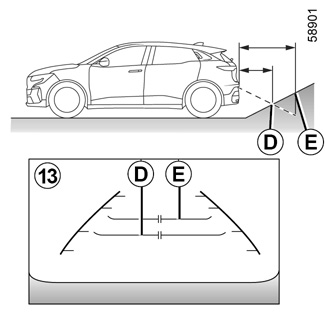
Driving or reversing towards a steep uphill slope
The fixed guidelines 13 show the distances as closer than they actually are.
The objects shown on the screen are actually further away on the slope.
For example, if the screen displays an object at D, the actual distance of the object is at E.
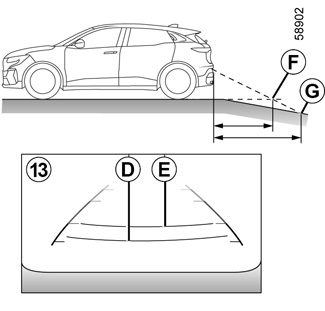
Driving or reversing towards a steep downhill slope
The fixed guidelines 13 show the distances as further than they actually are.
Therefore, the objects shown on the screen are actually closer on the slope.
For example, if the screen displays an object at G, the actual distance of the object is at F.
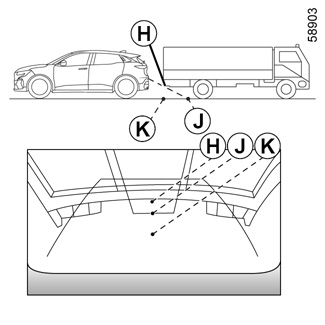
Driving or reversing towards a protruding object
Position H seems further than position J on the screen. However, position H is at the same distance as position K.
The trajectory indicated by the fixed and mobile guidelines do not take into account the height of the object. So there is a risk that the vehicle may collide with the object when reversing towards position K.
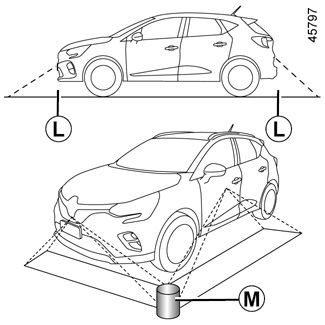
Limitation of the system operation
The system is unable to display objects located in certain areas.
In the front or rear view mode, the system cannot be used to view an object in area L.
In bird’s eye view mode, the system cannot be used to view a large object in area M (near the edge of the displayed area).
Adjusting the display
From the multimedia screen, when the “360° Camera” system is displayed, you can change the views (e.g. Replace the rear view with the panoramic rear view).
For safety reasons, carry out any adjustments when the vehicle is not being driven.
If the gear lever is in the R position, the following views are available:
- screen split between the rear view/bird’s eye view;
or
- panoramic rear view;
or
- side view/bird’s eye view (depending on the vehicle);
or
- 3D view (depending on the vehicle).
When shifting from reverse gear to P position, the views available are:
- screen split between the rear view/bird’s eye view;
or
- panoramic rear view (depending on the vehicle);
or
- side views/bird’s eye view (depending on the vehicle);
or
- 3D view (depending on the vehicle).
When shifting from reverse gear to D position, the views available are:
- screen split between the front view/bird’s eye view;
or
- front panoramic view;
or
- side views/bird’s eye view;
or
- 3D view.
Adjusting the camera settings
From the multimedia screen, when the “” system is displayed, press the “360° Camera” button Settings to add or remove the guide lines and adjust the camera image settings (brightness, contrast, etc.)
Please refer to the multimedia instructions for further information.
Note: for safety reasons, the views are not displayed in the “Settings” menu while the vehicle is moving.