CAMERA REAR VIEW
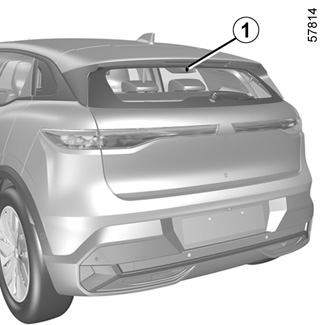
Depending on the vehicle, the rear view can be displayed by the camera 1.
Direct rear view by mirror remains available at all times.
The 1 camera is installed behind the rear screen in the wiper area.
Make sure that the 1 camera is not obscured (by dirt, mud, snow, condensation etc.).
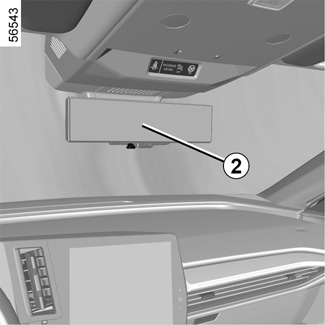
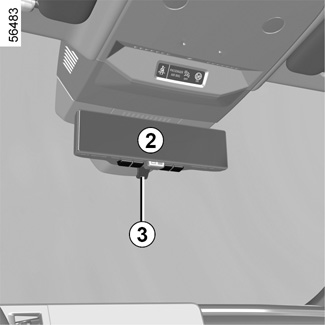
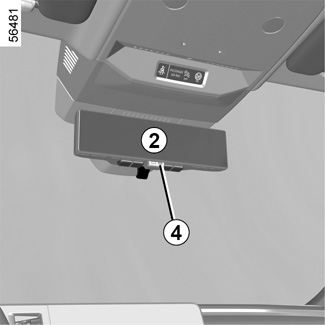
When the ignition is switched on, the rear view mirror 2 mounted on the roof centre console displays the view behind the vehicle that is transmitted by the camera 1.
Note:
- the camera display 1 is transmitted only if the rear view mirror is in “screen” mode. For more information, see the “Operation” paragraph on the following pages;
- the rear view mirror 2 can be positioned left to right and upwards and downwards.
This function is an additional aid. It cannot, therefore, under any circumstances replace the vigilance or the responsibility of the driver.
The driver should always be ready for sudden incidents while driving: always ensure that there are no small, narrow moving obstacles (such as a child, animal, pushchair, bicycle, stone, post, etc.) in the blind spot when manoeuvring.
Operation
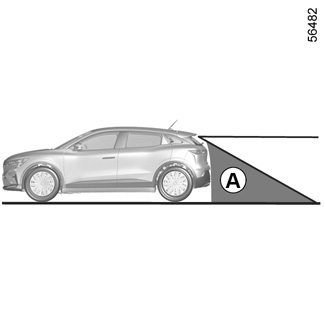
The camera’s field of vision does not cover the entire area behind the vehicle, particularly the blind spot area A.
Switching off the function
The display switches off immediately after the ignition is switched off.
Note: “mirror” mode can be maintained by activating the lever 3.
Depending on your vision, an adaptation time may be necessary to focus on the camera view display.
Objects which appear on the edge of rear view mirror 2 may be appear distorted.
In very bright light (snow, vehicle in sunshine, etc.), the camera view may be partially disturbed.
In low brightness or poor weather, the image on the screen may be distorted.
Operation
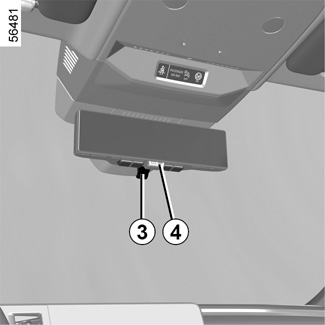
Use the lever 3 to switch between “mirror” mode and “screen” mode.
The green LED 4 as well as the pictogram displayed at the top right of the rear view mirror indicates that the screen mode is operating properly.
It goes out if you switch to “mirror” mode or in the event of a fault.
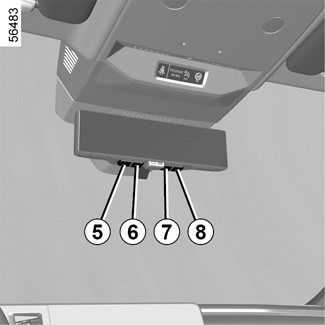
Adjusting the display and the camera
Press the 5 “menu” button once to access the settings menu.
Repeatedly press the 6 and 7 buttons to scroll through the settings options. Press the 8 “OK” button to access the desired setting.
Use the 6 and 7 buttons to adjust or activate/deactivate the desired setting.
Selecting the settings:
a) adjusting the brightness;
b) adjusting the vertical viewing angle;
c) adjusting the horizontal viewing angle;
d) adjusting the angle of rotation;
e) activating/deactivating the settings menu display on the rear view mirror;
f) selecting a language;
g) activating/deactivating button backlighting.
Exit from the settings menu occurs automatically after approximately five seconds if no button is pressed.
Each time the vehicle is started, the function returns to the settings saved at the last engine stop.
For safety reasons, carry out any adjustments while the vehicle is stationary.
Adjust the system field of vision and the door mirrors before driving. Be sure to adjust the central rear view mirror before switching to “screen” mode.
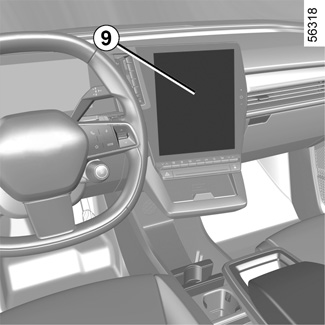
Special features related to the reverse gear
When the vehicle is reversing, pay attention to the images transmitted by the reversing camera (multimedia screen 9) in addition to the information available through the rear view mirror as there remains a rear view blind spot REVERSING CAMERA.
Operating faults
When the system detects an operating fault, the rear view mirror 2 turns black, the image displayed at the top-right of the mirror disappears and the LED 4 screen is switched off.
This may be caused by a fault affecting the camera or screen (clearness, fixed image, delayed communication etc.).
If the black background persists, switch to “mirror” mode and consult an approved dealer.