HEADLIGHT BEAM ADJUSTMENT
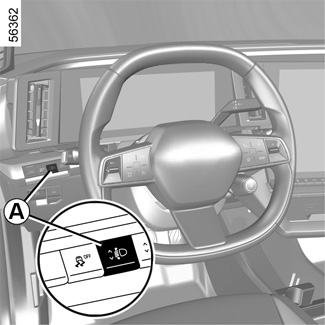
Depending on the vehicle, the A switch can be used to adjust the height of the headlight beams according to the load.
With the dipped beam headlights lit, press or lift switch A as many times as is necessary to select the required position on the instrument panel. The position selected is displayed on the instrument panel for approximately 15 seconds.
Note: if the lights are on, at each engine start-up the selected position is displayed on the instrument panel for approximately 15 seconds.
Examples of positions for adjusting control A according to the load | |
|---|---|
Driver alone or with front passenger | 0 |
All seats occupied | 1 |
Driver with passengers and luggage (or load) reaching the maximum permissible all-up weight | 2 |
Driver without passengers and luggage (or load) reaching the maximum permissible all-up weight | 3 |
The table below gives some examples. In all cases, adjust control A according to the vehicle load so that the road can be seen and other drivers are not dazzled. | |
When driving on the left in a left-hand drive vehicle (or vice versa), you must adjust your lights temporarily for the duration of your trip.
Temporary adjustment
This can be adjusted using the multimedia screen VEHICLE SETTINGS CUSTOMISATION MENU.
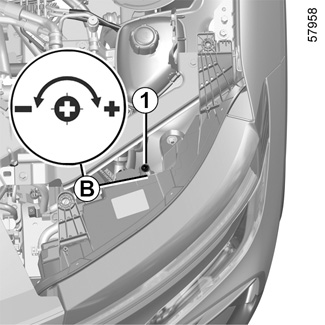
Depending on the vehicle, open the bonnet and identify the marking B near one of the front headlights.
Using a screwdriver or similar, turn the bolt 1 a half turn towards the - symbol to lower the beams.
Return to the original position once your trip is over: turn the bolt 1 a half turn towards the + symbol to raise the beams.