NAVIGATION SETTINGS
| “Settings” menu |
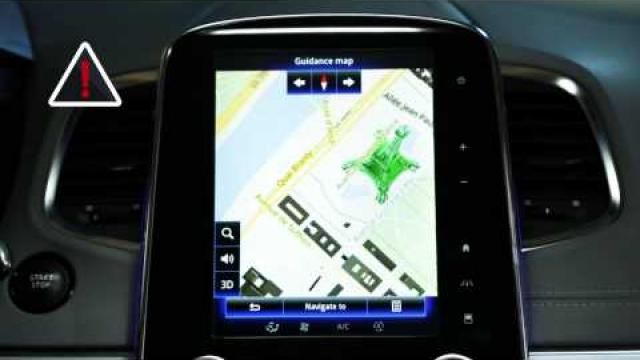
From the “Navigation” menu, press “Settings”, then select the subcategory you wish to change: - “Sound and warnings”; - “Route”; - “Traffic settings”; - «Map settings»; - “Visual guidance”. | |

| “Sound and warnings” | |
This menu allows you to define the synthetic voice in the multimedia system, the various sounds and the navigation warnings. “Navigation voice” This menu enables you to adjust the following settings: - choosing the synthetic voice; - adjusting the synthetic voice to; - choosing the language of the synthetic voice; - the details of transmitted vocal information (minimum, standard or detailed etc.); - the type of voice used (female or male). Note: the type of voice setting selected applies to the navigation, voice recognition and the apps. | ||

“Safety warnings” This menu enables you to activate or deactivate the various safety warnings and to set them in order to activate a sound and/or visual alarm when approaching certain locations such as schools, level crossings, hazardous areas, etc. You can programme the navigation system so that it displays these increased vigilance points on the map, and so that you can be warned by a beep when you approach these areas. For some of these areas, there is a legal or recommended speed limit. The beep may differ depending on whether you are driving under or over the speed limit. Choose to be warned when approaching these increased vigilance areas or only when you are exceeding the speed limit. |
“Warning sign alerts” This menu enables you to activate or disable the various road sign alerts. Activate this function so that the system indicates when approaching specific sections of road (obstacles, tight corners, crossings, etc.) by displaying road signs on the map screen. For each category of warning sign, set the warning type (audio and/or visual) and the distance from the hazard from which you want to receive a warning. “Route warning” This menu enables you to activate or disable the alerts affecting your route such as pedestrian areas, inaccessible areas or areas requiring special access permissions. |
To reset your data and go back to the default settings, press the pop-up menu button, then “Reset”.
In certain countries it is illegal to activate the camera warning option and this could lead to prosecution.
| “Route” |
“Route Planning Method” This function enables the current route calculation method to be changed and to recalculate if necessary. By choosing this type of route itinerary, you are also setting the default route calculation method for future route calculations. To understand the various methods for calculating the route, please refer to the section on “Map”. Route preferences The route preferences are restrictions which affect the route calculation. For further information, please refer to the section on “Map”. | |

| Traffic settings | |
This menu lets you: - activate or deactivate traffic info; - configure detours around events (the navigation system will calculate a new route); - select the type of event and its display on the map. For further information, please refer to the section on “Traffic”. Note: the availability of the “Traffic” services may vary. | ||
| “Map Settings” | |
This function enables you to set the map display, point of view of the map, etc. For more information, refer to the section entitled “Map”. | ||


Precautions regarding navigation
Use of the navigation system does not in any way replace the responsibility or vigilance of the driver when driving the vehicle.
| “Visual guidance” |
This menu displays information relating to your route on the navigation screen. “Data fields” The data fields in the corner of the navigation screen can be customised. Select this option and choose the values you want to see. The values can differ depending on whether you are following a route or whether you are travelling without a set destination. You can choose to display the remaining distance to your destination/next waypoint, the remaining time until you reach your destination/next waypoint, or the estimated arrival time for your destination/next waypoint. | |

“Tunnel view”
When entering a tunnel, the surface roads and buildings can count as a disturbance. This feature shows a generic image of a tunnel instead of the map. A top-down overview of the tunnel and the remaining distance to the tunnel exit are also displayed.
“Signposts”
Whenever relevant information is available, such as information similar to that displayed on road signs, it will be displayed in the upper section of the map. You can turn this feature on or off.
“Junction view”
If you are approaching a motorway junction or a complex crossroads and the necessary information exists, the map is replaced with a 3D view of the junction. You can activate this function or keep the standard display throughout your route.
To reset your data and go back to the default settings, press the pop-up menu button, then “Reset”.
For safety reasons, carry out these operations when the vehicle is stationary.